LIGHTING
PLEASE NOTE: No lighting equipment should be used if you have not been shown how to use it by a member of the tech team.
The George Wood Theatre, Studio 1 and Studio 3 have a ‘General Rig’ (Lighting Plan can be found on the VLE and in the control box of the space). Only the students who have been inducted by Chloe or Nao are allowed to access the lighting systems.
You must e-mail Chloe c.kenward@gold.ac.uk & n.nagai@gold.ac.uk if you would like to access the control box at least one week in advance. Particularly if you are requesting access for a project not part of a module that we expect regular access for, the more notice you give us the better, so we can meet your request as best we can. (If you request the access to the box with little notice, we may be unable to accommodate the request.) Evening and weekend access is restricted.
Once you are finished in the control box, you must lock/padlock the door/desk as we have had some theft in the past and some spaces are near the college main thoroughfare.
Please DO NOT leave the room unattended when the control rooms are open or stage lights are on.
Nobody can use the tension wire grid (located above the GWT stage) without prior instruction from a staff member, who MUST be present in its time of use. Please remove all loose items of clothing, jewellery, and anything in your pockets before using the grid.
Email Chloe and Nao if you would like to request to borrow lighting kit, ensuring you include the dates required. Please be aware that sometimes we are not able to meet all requests, because of demands on our kit for teaching and practice modules, particularly in the spring and summer terms.
Whenever borrowing the kit, treat it with respect, and please return it as you borrowed it or neater i.e., cable coiled neatly, colours put back in the folder and in the place specified by Chloe or Nao.
Borrowing Kit
If you run a cable on the floor, to minimise the trip hazard, you must tape down the cable following the procedure below. Tape can be supplied by Nao, Chloe or any of the production staff. Taping down cables should be done using double width electrical tape (sometimes called ‘dance floor tape’) on the studio floors. If you are working in an exterior space, we can provide gaffer tape and / or cable matting.
1) Work out the best and neatest route for the cable. Where possible, run it alongside a wall, rather than cross a space unnecessarily. Try to avoid tape running across doorways, entrances to the stage, or areas of the space frequently walked across.
2) Tack down the cable with short pieces of tape to make a straight line. It is then much quicker and neater to lay the long straight length.
Cable Management
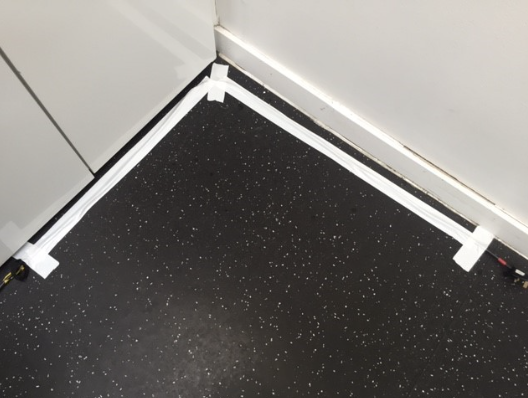
3) Finally, run a longer length of tape over the entire length of the cable. If you are taping multiple cables, you may prefer to use two strips of tape, so ensure they are securely taped.
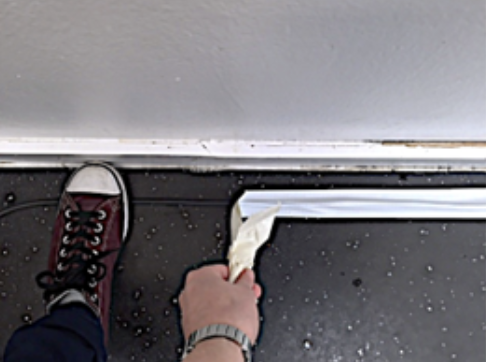
4) ALWAYS stand on / put pressure on the cable, as you lift the tape, so that the tape comes away from the cable. If you pull the cable up with the tape, the tape gets wrapped around the cable, and it becomes really hard to remove. Remove the tape carefully and slowly, so as to not damage paintwork.
There is a very specific way to coil audio and DMX cables that you will be shown practically. If you do not know this technique or have not quite mastered it, it is much better to leave them to someone who can coil them properly as coiling them in the wrong manner will damage them.